Showing posts with label Internet. Show all posts

Saturday, September 5, 2015


How to add or import your facebook friends to linkedin ..

The answer is so simple, all you need is yahoo account and follow these steps:

1- Open yahoomail.com and enter to your account then press on contact icon on the top right of the homepage. 


2- Now press on "Import" contacts from facebook and assign to contact list 

3- press "Agree"


4- Go to your linkedin account and press on "Add Connections" like photo below then import your contacts from your yahoo account. 


5- Congratulation, Now you imported all your friends from facebook to Linkedin.

If there is any question you are welcome to ask us here or on our page on facebook Smart Computer Tricks .


Sunday, August 30, 2015


   Not everyone wants to watch a full video, link to the exact location you found most entertaining instead of making your friends or family watch the full video. To do this get to the location you want and pause the video. Once paused right-click the video and select Get video URL at current time and then copy the link created.

   Alternatively you can manually add the time by adding "#t=XXmXXs" at the end of the URL, where XXm is the minutes, and XXs is the seconds into the video you want to start. For example:

https://www.youtube.com/watch?v=MKVWBUwoV4o
 would become

https://www.youtube.com/watch?v=MKVWBUwoV4o#t=33s
to link to the video 33 seconds into the video. If you wanted to link 4 minutes and 20 seconds into a video add #t4m20s to the end of the URL. Alternatively you can use only seconds, so 4 * 60 (seconds in a minute) = 240 + 20 = 260 seconds for 4 minutes and 20 seconds into the video.

Sunday, August 16, 2015


During your browsing  in Google Chrome, Firefox or any other browser, you may face some strange errors , the most famous one is DNS_PROBE_FINISHED_BAD_CONFIG error. The error Stops you from accessing Web Pages like Facebook, Gmail or Google.com itself. This Error in your Browser Points out that DNS lookup Failed while loading the webpage for you.

It doesn’t matter which Windows Version you are using, This is a Internet Connection Error and is displayed in Browser. This Bad_Config Error is gaining Popularity in recent times as more and more people are getting it. But Today We will Show you 3 Ways to Fix DNS_PROBE_FINISHED_BAD_CONFIG error.

So in this post i will be Sharing 3 different ways to Solve this issue. After Which you will be able to Surf Internet and Open Sites easily just like before.


Method 1: Release/Renew Ip Address.
In this Method, you will be releasing your ip address and then renewing it again. If the Problem is with your IP address then this method should work for you. Just Follow the Below Simple Steps.

Step 1: Open Command Prompt(cmd) By Pressing Combination of Windows key + R to open run. Now type in “cmd” and Hit Enter.

Alternatively, you can Press Windows Key + X , then Click on Command Prompt (Admin).

Step 2: Now that your Command Prompt is ready, Type in ipconfig /release then hit enter.

Step 3: Now again type in ipconfig /renew and hit enter. This will Renew your IP address.

Step 4: Close the Command Prompt and open your Favorite Browser to Check if the Problem is solved.


Method 2: Flushing DNS.
  • In This Method We will Be Flushing DNS to Solve Error Code: DNS_PROBE_FINISHED_BAD_CONFIG. This will Most Probably Solve the issue if the Problem is in your DNS Cache. Follow below Steps.

  • First of all Open Command prompt.
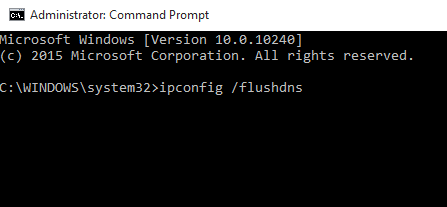
  • No type in “ipconfig /flushdns” without Quotes and hit Enter.
  • You can see your dns is succuessfully Flushed.
  • Open your Browser and see if the issue is still there or you have now fixed it.
Alternatively instead of ipconfig /flushdns you can also type “netsh winsock reset catalog” and see if that works. Move on to the Next and Final Method if this doesn’t help.


Method 3: Tweaking DNS Settings.


If both of the above method didn’t helped you to fix DNS_PROBE_FINISHED_BAD_CONFIG error then Use this method. It Requires you to do minor Tweaking in your DNS Settings But In most cases this fixes the issue if done correctly. Follow the below Explained Steps.

  • Right Click on Network icon in taskbar then click on Open Network and Sharing Center.
  • Now from the Left pane, find and Click Change Adapter Settings. This will Open up Network Connections.
  • You will be presented with a new window with all Network Connections, Right Click on Active Connection and select Properties.
  • Now look for Internet Protocol Version 4 (TCP/IPv4), Double Click on it to open its Properties.
  • In the Properties Window, Click on Use the Following DNS Server Addresses and Type in 8.8.8.8 in Preferred DNS Server and 8.8.4.4 in Alternate DNS Server Just like shown in Below Picture. Then Click on OK.

Now Open your Browser and you will see that you have successfully Fixed Error Code DNS_PROBE_FINISHED_BAD_CONFIG now.

Now you can continue your browsing without ant problem :) .. Hope you enjoy and dont forget to visit our page on facebook Smart Computer Tricks

Sunday, August 9, 2015


The Undo Send feature is an official part of Gmail So let's see how the feature works:

1- First, log in to your Gmail account on your computer.

2- In the upper right corner of the screen, click the Settings icon (the one that looks like a gear).

3- From the Settings menu, choose the option for Settings.

4- From the Settings window, make sure the General tab is selected.

5- Look for the setting that says Undo Send.

6- Click the check box to Enable Undo Send.

7- Click the drop-box to set the Send cancellation period, meaning the number of seconds you have to prevent the email from being sent. You can choose 5, 10, 20 or 30 seconds.

8- Scroll to the bottom of the Settings screen and click the Save Changes button.


To test the feature, click the Compose button at the upper left corner of your Gmail account page.
Compose a message and then click the Send button.

At the top of the screen, you'll see a message that says: "Your message has been sent. Undo. View Message."To prevent the message from being sent, click the Undo link.


Gmail stops the message from going out and displays it in case you wish to make any changes and then resend it. If not, you can simply close the message, and it's relegated to your Drafts folder where you can keep it or delete it.


The Undo Send feature is a handy way to ensure that the wrong email doesn't get sent to the wrong person.

Saturday, August 8, 2015


Today I will show you a funny Facebook trick gives you the ability to update your status via anything, any brand or device you want (iphone 7, Play Station, Radio, MyCar :D  ).


Step 1: first of all you need to Create an app on Facebook, It's not difficult at all, you don't need to do any Coding, Follow me while I show you how to do it.

Step 2: Click here to go to Facebook Developer page, there if you are asked to register as developer,read this step and if you are not asked and you are already registered then skip to Step 3.

Step 3: Now you are Registered as Developer, Now click on Create new app and choose "Website",


Step 4: Name it any thing you want to show as “updated via X” . Here in my case it will show ” updated via iphone 7 .So now click on Create New Facebook App ID .


then Create App ID


Step 5: After pressing on Create App ID, a new page will appears, just scroll down and type in the box of  Site URL your website or any site you want.


 then press Skip Quick Start to show you this page


Step 6: Your app is Ready, Now its time to use it. Simply Copy the Below URL, Open new tab in your Browser, Paste it in address bar, You will have to Replace my APP ID with yours in following URL which is Highlighted in Red Color, also Replace website URL with the URL that you wrote it before.


https://www.facebook.com/dialog/feed?app_id=467467467467&redirect_uri=http://s-c-t.blogspot.com

Step 7 : Once you have Replaced the app id and Pasted the URL in your address bar, hit enter and boom, you will see something like below Pic,obviously with your app name.


Step 8: Now its time to let your Friends know about this, Write your status and click on Share. You will Be redirected to s-c-t.blogspot.com  but its time to check your timeline to see your post via Facebook Status.

Conclusion :

So Now in this Article you learned how to Create your own App and how to Post a status Via something on Facebook. If In Case you find it Tedious, then i will share one more method.
hope you like this trick, Don't forget to press like on our facebook page or visit us on s-c-t.blogspot.com... bye bye :)

Wednesday, August 5, 2015


1. Open Notepad and type paste below code into it.
netsh wlan set hostednetwork mode=allow ssid=FreeWIFI key=12345
netsh wlan start hostednetwork
2. Now you can change the SSID by changing code in blue color and you can change the security code in red color.
3. Now make sure to save this file as Start.bat and its done.
4. Now create another new Notepad file and paste below code into it.
netsh wlan stop hostednetwork
Save this file as Stop.bat and your Wi-Fi Hotspot stopping process is up.
So now when ever you want to start the Wi-Fi Hotspot simply double click the Star.bat file and your Wi-Fi hotspot will start to broadcast.
As soon as you are done you can double click the Stop.bat file and your broadcast will be stopped.

Sunday, August 2, 2015

The Real Power of Google Search Engine.
Easy Trick on Google to find Any Serial Number for any Software You want .
1- Go to Google.com
2- Write "94FBR" after the name of the software which you want it's serial.. For example: You want a serial number for internet download manager so just type "IDM 94FBR"
3- Click Search and Find what you want

Command Prompt can let you know if someone is connected to your Local Area Connection and using it.
Just follow the steps:-
1- Open your browser and visit http://192.168.1.1 or http://192.168.0.1 depending on your router.
2- Find the tab that mentions “Attached Devices” or something similar.
3- Find the computer name, IP address and MAC Address (sometimes called Physical Address or Hardware Address) of your computer [you can know your IP address, DNS Server's address and a lot more about your Internet Connection by typing "ipconfig/ all" without quotation in the command prompt and press Enter.]
4-Compare it with those displayed by your router in Step 2.
If you notice some strange devices, then your neighbour has been sneaking in on your internet connection and it is best to set a password.

Sometime you want to see clear image of someone on facebook who might not be your friend but his/her privacy setting stop you from doing this. In this trick i will teach you how to view facebook private or locked profile picture in large size smile emoticon
1. Open the facebook profile of person whose profile picture is locked or is set to private.
2. Right click on the profile picture and click on Copy Image Url as shown in image below.
3. Open that image in new tab by right clicking and selecting Paste (CTRL + V)
4. Now change the value of image size highlighted below which might be s160x160 to s720x720 (If its not clear try (s320x320).
5. The image will enlarge in size. This trick does not always work .

1- Automatically add www. and .com to a URL
You can shave off a couple of seconds typing in a URL by simply click CTRL + Enter after you type the name of the site. Need .net instead of .com, press CTRL + Shift + Enter instead.
2- Jump to address bar
There are a number of ways to jump right to the address bar from anywhere in browser. Pressing CTRL + L, F6, and ALT + D all accomplish this goal.
3- Bring back a closed tab We covered this already
Accidentally closed a tab? Simply press CTRL + Shift + T to reopen the most recently closed tab and get back to what you were doing.
4- Use private browsing
The uses for not having cookies and history saved are obvious for certain activities, you know, like shopping for gifts on a shared computer (of course!). Pressing CTRL + Shift + N will launch a new private in Chrome, CTRL + Shift + P will do it in Firefox and Internet Explorer.
5- Cycle through open tabs Pressing CTRL + TAB while in a browser will flip between each one. This can be much faster than moving the mouse and clicking on a tab. CTRL + NUM (1, 2, 3, 4, n..) will also take you to certain tab in that numeric order.

Blank post on Facebook
Go to wall post click “Update Status” tab
Then press Alt + 0173 in the status box
And Post it  :)


Many people know how to deactivate their fb account but not all of them know how to delete it .
To Delete your Facebook account just click on this link then put your password and goodbye Facebook .  https://www.facebook.com/help/delete_account
1. Open the Google Chrome Browser on your PC or MAC 
2. Then go to the web page that you want to convert as a PDF. 
3. Now press Ctrl+P on Windows PC or Command+P if you are on a Mac to Open the the Print dialog on Chrome Browser. 
4. Now Change the destination to “Save As PDF” and hit the save button.
5. The current web page will instantly be downloaded as a PDF document.


Firefox is one of best browser and there are some funny tricks that you can do with your firefox browser.These will not harm your browser and they are tested in the latest version of firefox i.e firefox 4.0
Here are Some Funny Firefox Trick
To perform these tricks open your firefox browser and copy/paste the following in your address bar
chrome://global/content/alerts/alert.xul
This will show you dancing firefox.Your firefox window will automatically popup anywhere at screen.
· chrome://browser/content/browser.xul
This will open another firefox within in a new tab.So you will have firefox within firefox.
· chrome://browser/content/preferences/preferences.xul
This will open firefox options dialog box in new tab.
· chrome://browser/content/bookmarks/bookmarksPanel.xul
This will open your firefox bookmark manager in new tab.
· chrome://browser/content/history/history-panel.xul
This will open your history in new tab.
· chrome://mozapps/content/extensions/extensions.xul?type=extensions
This will open your extensions tab in your current window .
· chrome://browser/content/preferences/cookies.xul
This will Open the “cookies window” inside a tab in the Firefox window.
· chrome://browser/content/preferences/sanitize.xul
This will Open the “Clear Private Data” window inside the current tab.
· chrome://browser/content/aboutDialog.xul
This will Open the “About Firefox” Dialog box inside the tab.
· chrome://browser/content/credits.xhtml
This will Open a scrolling list of names. The one’s who we must thank for creating Firefox

Saturday, August 1, 2015

The Domain Name System (DNS) is used to resolve human-readable host names like www.google.com into machine-readable IP addresses like 216.58.210.14.
The translating process from a domain’s name to be an IP address takes a time, so the faster DNS that you use, the faster this process will be.
Many internet providers provide free public DNS Server but only few ones are fast. I have already tried several free public DNS Server from some world-class providers and I can feel the difference, web browsing is faster and more responsive.
These are the lists of top 12 free fast public DNS Servers that I recommend you to use: